How to Repair Tongue-and-Groove Flooring in an Old Gym Floor
When it comes to maintaining the charm and functionality of an old gym, one of the key aspects is the floor. Many old gyms feature beautiful tongue-and-groove hardwood floors that have seen years of wear and tear. If you’re looking to bring new life to these classic floors, you’re in the right place. Here’s a step-by-step guide on how to repair tongue-and-groove flooring in an old gym.
Step 1: Assess the Damage
Before diving into repairs, take a good look at the floor. Identify the areas that need fixing. Are there loose boards, gaps, or damaged sections? Understanding the extent of the damage will help you gather the right materials and tools for the job.
- Loose Boards: Boards that have come loose from the subfloor.
- Gaps: Spaces between the boards due to shrinkage or movement.
- Damaged Sections: Boards that are cracked, split, or otherwise compromised.
Step 2: Gather Your Tools and Materials
Here’s what you’ll need to get started:
- Replacement tongue-and-groove boards
- Circular saw or handsaw
- Pry bar
- Hammer and nails
- Wood glue
- Wood filler
- Sandpaper (various grits)
- Finishing materials (stain, sealant, etc.)
- Safety gear (gloves, goggles, knee pads)
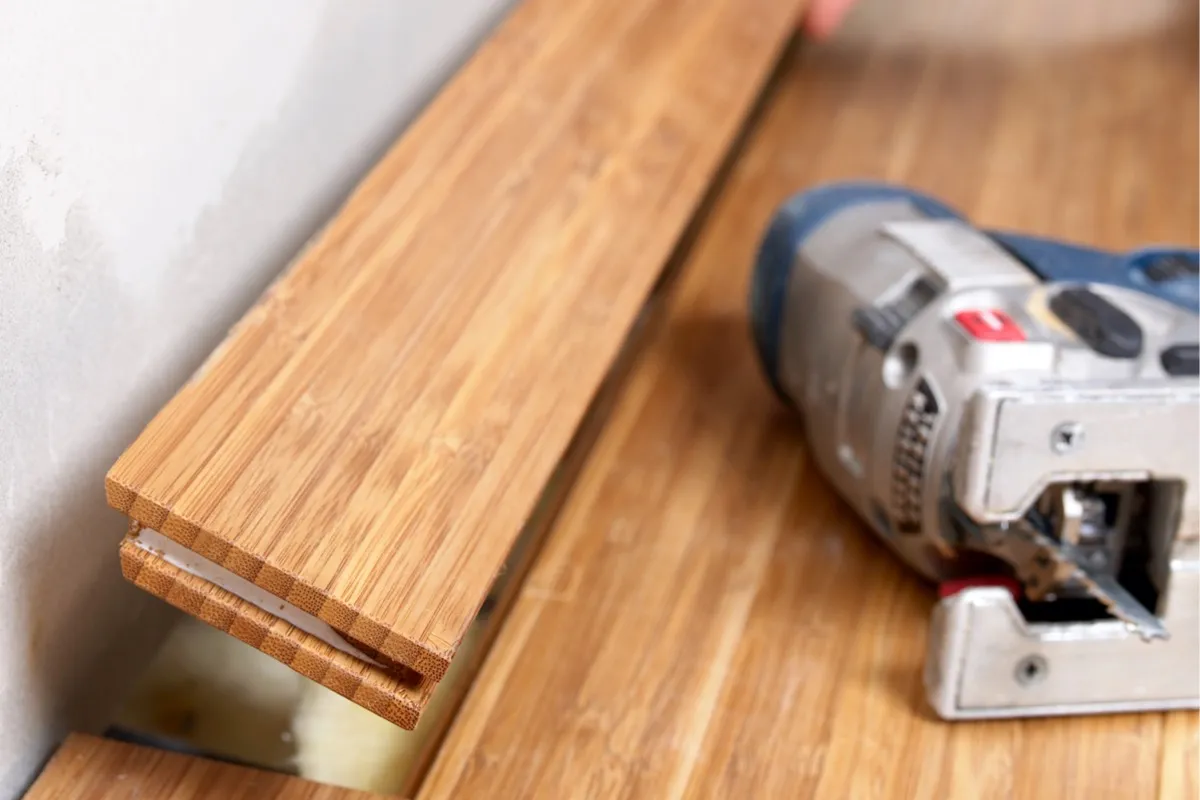
Step 3: Remove the Damaged Boards
Start by carefully removing the damaged boards. Use a circular saw to cut the board down the middle, then pry it out with a pry bar. Be cautious not to damage the adjacent boards during this process.
- Cutting: Make a cut in the middle of the damaged board to relieve pressure.
- Prying: Use a pry bar to lift and remove the damaged pieces.
Step 4: Prepare the Replacement Boards
Measure the gap left by the removed board and cut the replacement board to fit. Ensure the new board matches the existing flooring in thickness and appearance. If needed, trim the bottom edge of the groove side of the board to fit it into place.
- Measurement: Measure twice, cut once to ensure a perfect fit.
- Trimming: Trim the groove side to help the board fit snugly.
Step 5: Install the Replacement Boards
Apply wood glue to the tongue of the new board and slide it into place. Tap it gently with a hammer to ensure it fits tightly against the adjacent boards. If necessary, use finishing nails to secure the board to the subfloor.
- Gluing: Apply a thin layer of wood glue to the tongue.
- Fitting: Slide the board into place and tap gently with a hammer.
- Nailing: Use finishing nails for added security.
Step 6: Fill Gaps and Sand the Floor
Once all the replacement boards are in place, fill any gaps with wood filler. Allow the filler to dry completely, then sand the entire area to ensure a smooth, even surface. Start with a coarse grit sandpaper and gradually move to finer grits for a polished finish.
- Filling: Use wood filler to close any gaps.
- Sanding: Sand the floor starting with coarse grit and finishing with fine grit for a smooth surface.
Step 7: Refinish the Floor
After sanding, it’s time to refinish the floor. Choose a stain that matches the original color of the floor, or opt for a new look if you’re feeling adventurous. Apply the stain evenly and let it dry. Follow up with a sealant to protect the wood and give it a glossy finish.
- Staining: Apply an even coat of stain and let it dry.
- Sealing: Protect the floor with a clear sealant.
Step 8: Regular Maintenance
To keep your gym floor looking its best, perform regular maintenance. Sweep and dust mop the floor daily to remove dirt and debris. Use a damp mop with a pH-neutral cleaner for deeper cleaning. Avoid using harsh chemicals that can damage the wood.
- Sweeping: Daily sweeping to remove dirt.
- Mopping: Use a damp mop with a gentle cleaner for regular cleaning.
- Avoiding Chemicals: Steer clear of harsh cleaners that can damage the finish.
